Art of Air Airbrush Makeup System

Airbrush makeup is one of those luxuries that most people only consider for a special occasion. Recently, however, distributors have made this small luxury easily accessible to the everyday consumer at affordable prices. I recently purchased one of these affordable kits called the Art of Air Airbrush Makeup system. Here are a few thoughts.

Disclosure: I purchased this product with my own money for personal use after researching various airbrush makeup systems. All opinions are my own. Product links within this article are Amazon Affiliate links. These links help support the financial cost of this website.

Pros

Excellent Value

Art of Air Airbrush Makeup System
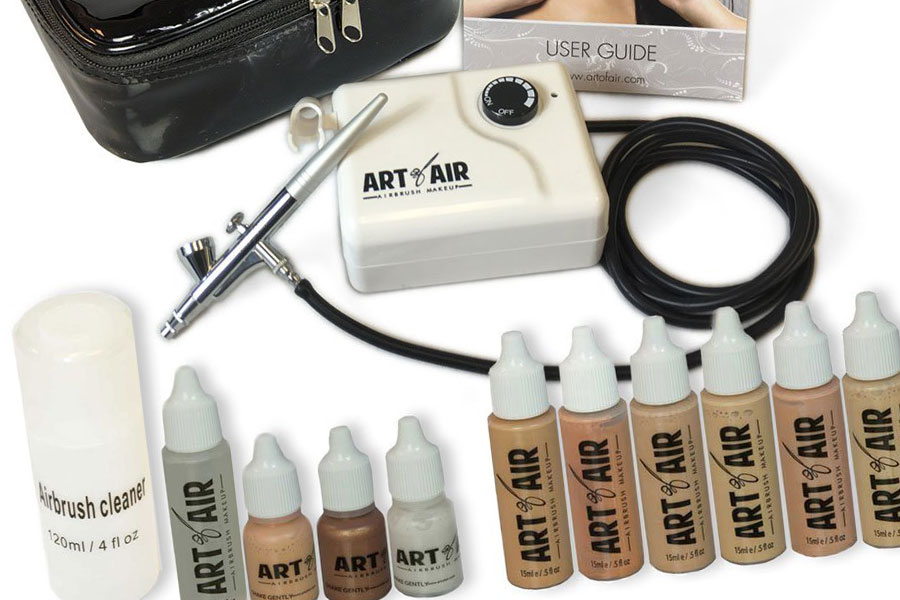
The Art of Air Cosmetic Airbrush System in Medium Tone is only $99.99 from ACM Global via Amazon. For this price this is what’s included:

  • Mini airbrush compressor (12V DC with a 110V AC plug in Adapter) with fully adjustable airflow control settings. The compressor also includes a 6 foot rubber airbrush hose and airbrush holder.
  • Single-action gravity feed airbrush with a 0.4mm tip and 1/16 oz. cup.
  • Fair to Medium Foundation Set that includes 6 bottles (½ oz each): Golden Olive, Sand, Honey, Buff Beige, Suntan Glo, and Moca.
  • Anti-aging Moisturizing Primer (½ oz bottle)
  • Tropical Bronzer (¼ oz bottle)
  • Pink Papaya Blush (¼ oz bottle)
  • Pearl Shimmer Highlighter (¼ oz bottle)
  • Airbrush Cleaner (4 oz)
  • Carrying bag

According to the Art of Air website, this kit was created for the professional in mind, but it’s easy enough for the at-home user as well.

Standard Components Offer Easy Maintenance

The Art of Air Airbrush cosmetic system isn’t very complex, which is not meant to be an insult. Sometimes simple is better. It’s like most standard airbrush systems. It has the compressor, which is lightweight and compact. The 6 foot rubber hose transfers the air from the compressor to the airbrush.

Air compressor hose
The 6 foot rubber hose slips onto the fittings for a snug fit. This component is pretty basic and can probably be replaced easily if yours becomes damaged.

The airbrush hose attachments are not complex either–you just slip them onto the fittings and you’re good. And even if you decide you don’t want to deal with 6 feet of rubber hose, you can probably cut it down and still be ok. The hose itself appears to be standard rubber hosing that you can purchase from most hardware stores if you ever need to replace it, just make sure you ask for the right size.

Ultimately what this boils down to is this: it’s a system that can be maintained easily and last a long time with a little tinkering and some knowledge. There’s nothing too extraordinarily high tech to have to deal with. If the airbrush gun clogs, the Art of Air has provided some helpful documentation on how to troubleshoot it.

Starting Kit Comes With a Variety of Foundation Colors

The airbrush cosmetic system kit that I purchased comes with 6 different 0.5 oz bottles of foundation: Golden Olive, Sand, Honey, Buff Beige, Suntan Glo, and Moca. For the at-home user who is new to airbrush foundation, this is the most valuable part because it allows them to find the perfect match via trial and error. However, for very pale or very dark skin tones, this can still be a challenge because most of the shades included are for medium to light skin tones. Optionally you can purchase additional bottles of Art of Air foundation to expand your color range, each retailing for about $9.99 from ACM Global via Amazon.

Great Documentation

Have you ever purchased an inexpensive product and discovered that the documentation materials were inferior? Sometimes they’re even just instructions printed on cheap copy paper and not even edited for grammatical correctness or accuracy.

The documentation for the Art of Air airbrush makeup kit is quite the opposite. It contains a 6 page, full color user guide that shows you how to setup, use, and clean the airbrush, step-by-step.

In addition to the user guide, it also has:

  • An airbrush spec sheet that has a cross section diagram of the airbrush gun.
  • An ingredient list for the foundation, bronzer, pearl shimmer, blush, primer, and airbrush cleaner so you know exactly what you’re using on your face and in your airbrush system.
  • A packet with a troubleshooting guide and several pages of airbrush makeup application tips.

Cons

Limited Selection of Bronzer, Highlighter, and Blush Colors

The Art of Air airbrush makeup system comes with a wide array of foundation colors for those whose skin tone falls in the light-to-medium range. It also comes with a copper-toned, shimmery bronzer, a pearly white, shimmery highlighter, and a bubblegum-pink blush. One would think that you could purchase additional colors from Art of Air, but those are the only colors they offer. So if you want a different kind of blush, you’ll probably have to purchase from another company’s line.

Small 1/16 oz. Cup

For those who want a versatile airbrush kit that can do both facial makeup and full body (i.e. spray tan) applications, this one might be a challenge. The 1/16 oz. cup is small and will require you to constantly refill for full body makeup. However, if you can find an alternative spray attachment that will handle the capacity and connect to the basic connector hose, then you’re in luck.

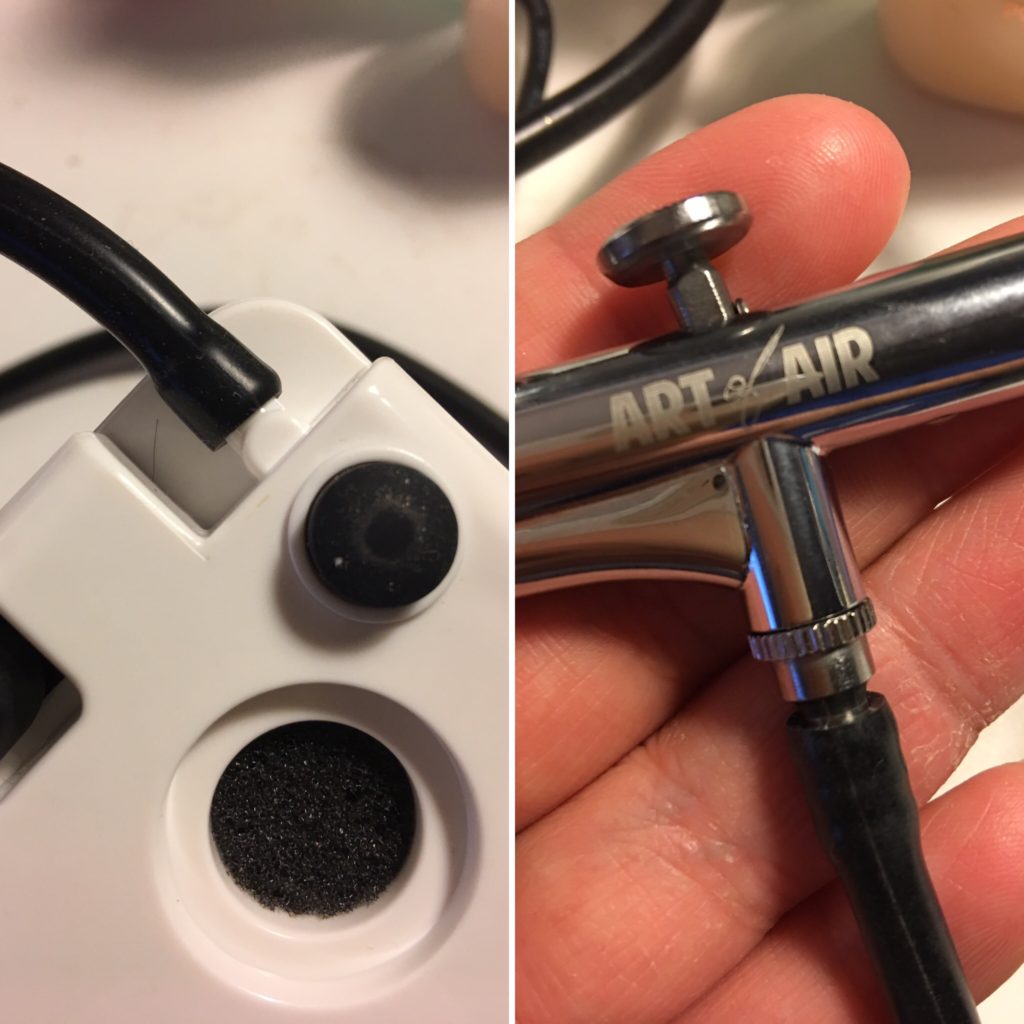
0.4 mm Airbrush Needle

So within a week of purchasing my cosmetic airbrush kit, I was tooling around with the spray attachment when I accidentally bent the tip of the needle. Accidents happen so I went on a hunt to try and find a replacement. The Art of Air didn’t have any listed on their website, so I searched Amazon and even online art retailers for 0.4 mm replacement needles. I discovered these were pretty difficult to come by. I found 0.2 mm, 0.3 mm, and even 0.5 mm needles, but I couldn’t find any 0.4 mm needles.

I’ve reached out to the Art of Air via email, but because it was late on a Friday, I don’t expect to get a response until the following week. Hopefully they’ll be able to tell me some more information about replacing this particular component. I’ll update this section as soon as I hear back.

In the meantime, I’ve managed to tinker with it enough to where the trigger doesn’t stick and application works smoothly. Still I’d like to get this part replaced ASAP (and possible have another spare on hand for the future).

05.07.17 Update: I received a response from the manufacturer and they offered to send me a replacement needle free of charge. They didn’t even pepper me with questions about when I purchased the product or where I purchased it. They just said they can send me a replacement and asked for my address information. I was impressed! On Friday, my package was waiting for me. The needle was contained within a secure plastic container and wrapped in several layers of protective bubble wrap. Now my airbrush performs perfectly!

Results

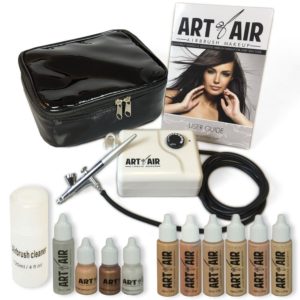
I’m impressed with the Art of Air system. It’s compact and comes with a carrying case and a complete set of products to try. For the price, this particular kit packs a lot of value.

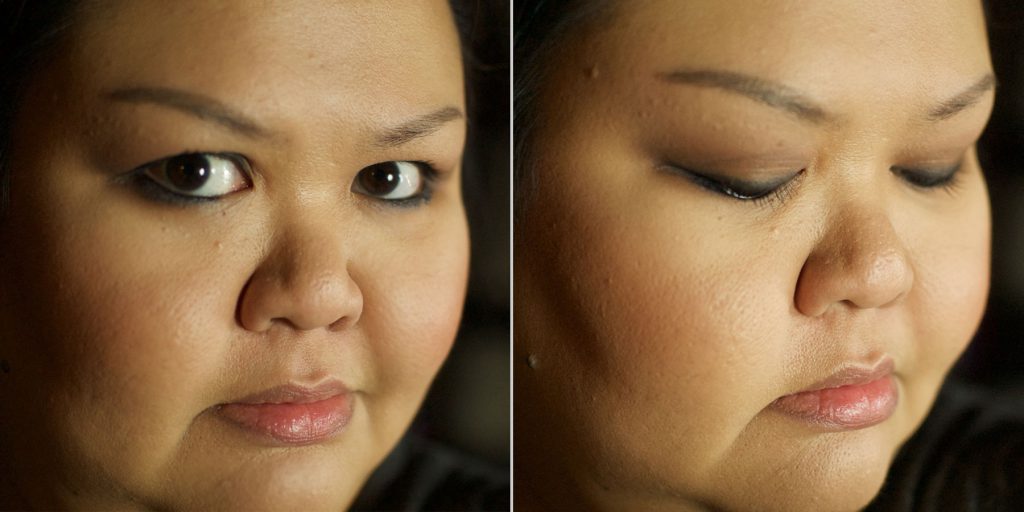
The quality of the machine is about average, maybe marginally better. The spray attachment produces a fine mist of foundation that seemingly floats on top of the skin for a feather-light application.

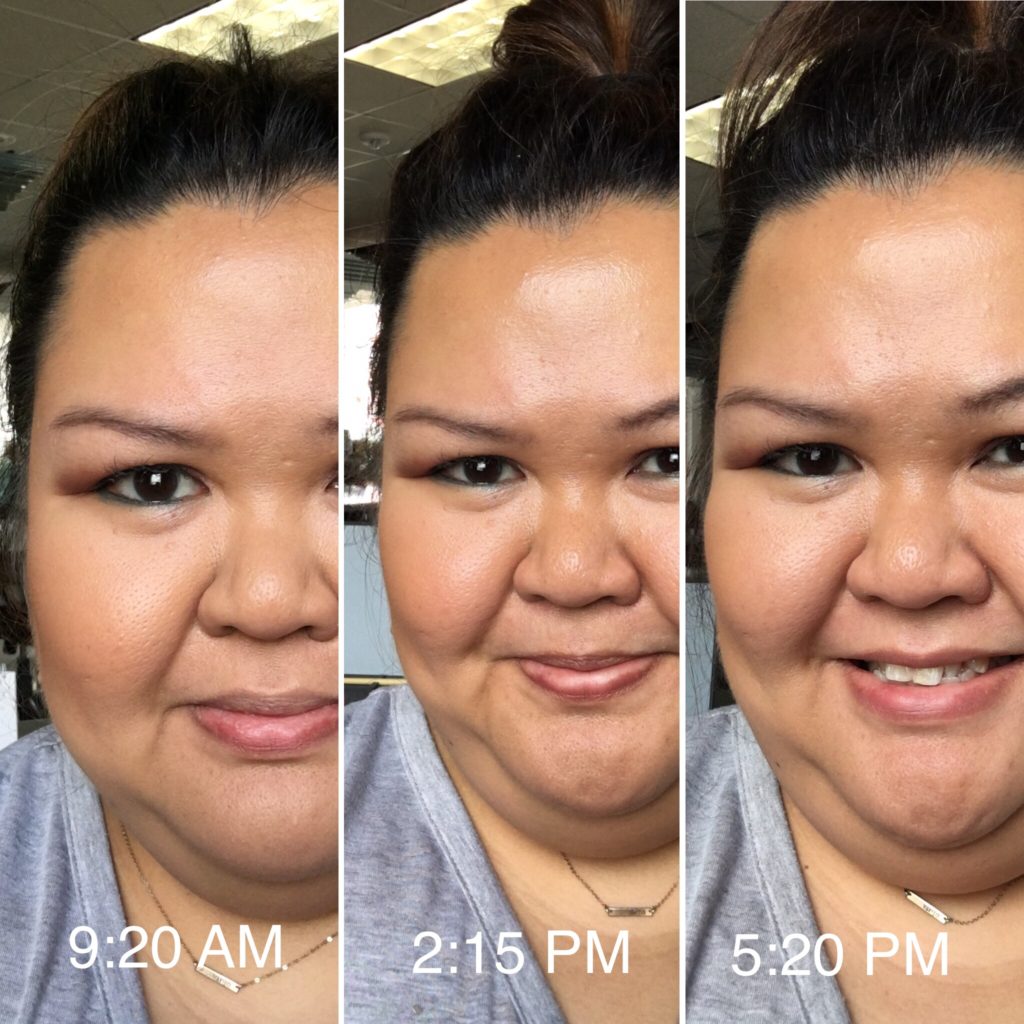
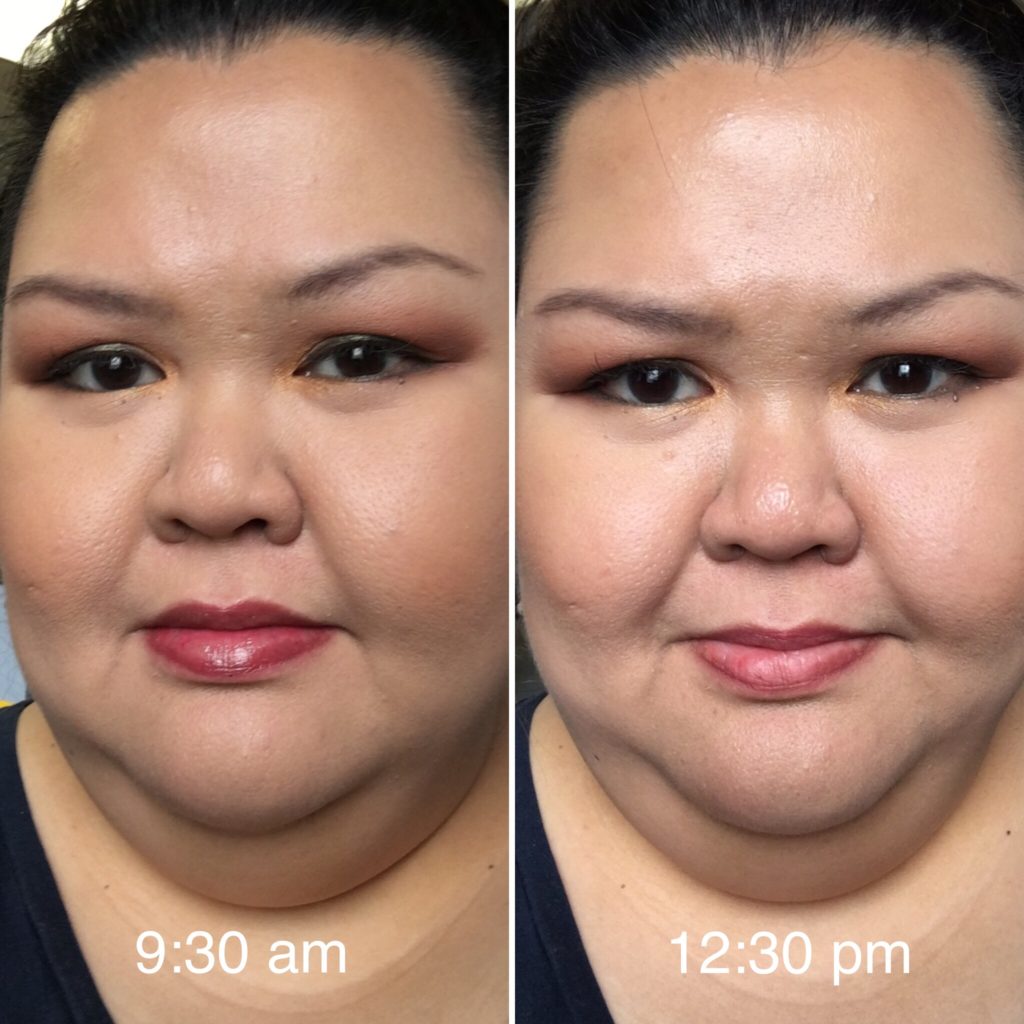
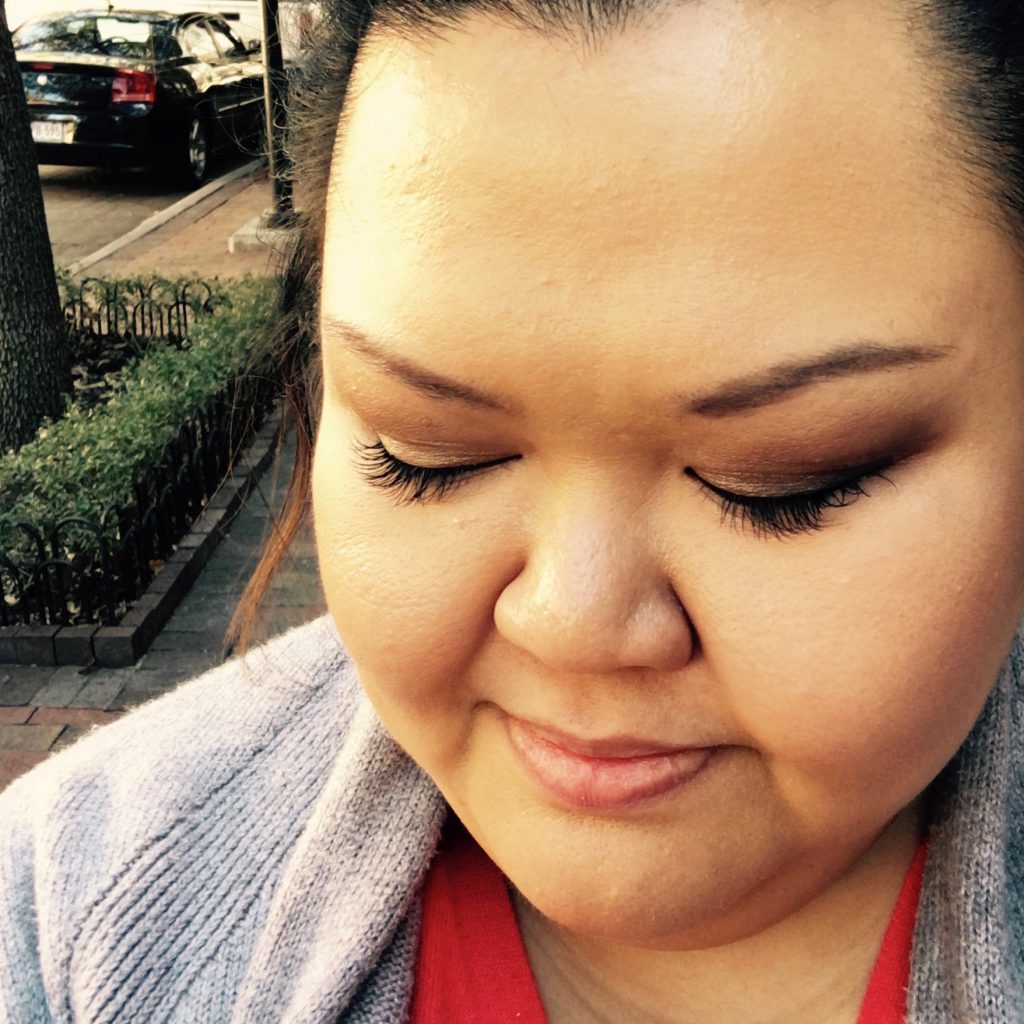
The quality of the foundation is nice as well. In fact, I would probably repurchase foundation from them when I run out. Unfortunately, their bronzer, highlighter and blush leave more to be desired. Below are some snapshots of how the foundation looked throughout the day.

Airbrush foundation
Snapshots of airbrush makeup throughout the day. You can see my skin does get a tiny bit oily as the day goes on, but that’s typical. The staying power is comparable to traditional foundation, with some fading around the chin and mouth (probably from lunch). And this is without finishing spray.
Stila Stay All Day Foundation - Honey
The following day, I did traditional makeup, which I applied with a brush, just to compare. Here I used Stila’s Stay All Day Foundation in Honey. Again, oiliness and fading areas were similar. However, because this was a creamier makeup, it felt heavy on my skin. I preferred the airbrush foundation over this one.

Life With Lash Extensions

Lash extensions are a beauty service that I probably would’ve never even tried had it not been for my new friend and up-and-coming esthetician Jennifer. The concept of paying someone a lot of money to apply tiny pieces of hair to one’s lashes seemed like an excessive expense at first. However, because Jennifer needed a real life model to practice on, I happily volunteered my time to this worthy cause. Here’s my experience getting lash extensions for the first time, but first a little bit more info about the process.

How Are Lash Extensions Applied?

If you’re not familiar with the process of lash extensions, it’s a bit long and laborious. Depending on how many individual lash applications your technician promises per eye, it can take anywhere from 1.5 hours to 3.

During this process, the technician covers up and tapes down your lower lashes to prevent them from interfering with the procedure. This pad also serves as the perfect canvas for your technician to work his or her lash magic.

The technician begins by cleansing your natural lashes thoroughly and then applies a primer. He or she then selects the perfect lash on which to apply the extension. Once they’ve identified one, each individual lash extension is then dipped in a special bonding glue and applied to the natural lash. This process repeated as many times until the desired lash look is achieved.

Living With Lash Extensions

And me, what about my experience? Like I mentioned before, the process is long and laborious, at least for the application of a full set. And if you’re like me, someone who has short, thin, unruly, wonky eyelashes that tend to have a mind of their own, it may be more of a challenge.

Thankfully, my esthetician is very professional and will ask for feedback not only to provide a better experience for her client, but to improve in her craft. She checked on me throughout the procedure, asking if I was comfortable or if I needed anything. We would occasionally take breaks so that I could stretch my back (the table at her school was so uncomfortable).

The before and after difference was striking though.

Photos courtesy of Jennifer Connor (Instagram: @ladyj1976).

Jennifer used mink lashes with a thickness of .2 (later we would decide this was too thick for my personal preference, so we switched to .15 during my first fill). The length varied between 8mm and 12mm.

It took a while to grow accustomed to the weight of the lashes. They were heavy compared to my natural lashes, and much more stiff. I couldn’t get them wet for the first 24 hours and even after the waiting period, I had to be extra gentle with them. I had to cleanse them gently once a day, and then gently pat them dry. Clearly gentle was the keyword.

Doing my eye makeup was also a bit of a chore. The extra length made lining my upper lashes a bit difficult. Eye pencil was more forgiving, but pen liner or even gel liner? Forget it. When I had to line my upper lid, my newly lengthened lashes were always in my way. Application was shaky, inconsistent, and uneven. I had to cover it up with pencil or dark eyeshadow the first couple times.

But still look at what a difference they make!

Lengthening mink lash extensionsMink lash extensions

My First Lash Extension Fill

Just like anything else in life and beauty enhancement services, lash extensions don’t last forever. So to maintain your look, you’re going to have to get lash extensions after your first set. I received my first lash extension fill about 2 weeks after the initial application. My left eye was looking a little bare primarily because that’s the side I most often sleep on. The process was shorter than a full set since Jennifer really only had to apply lash extensions where necessary. Still, she ended up having to do more of a 3 week fill because of my left eye. This time around, I’m going to try using a contoured sleep mask to help reduce the sleep wear. This particular sleep mask has a deep eye cavity that provides room for your lashes and reduce pressure on the eyes. It’s made out of soft, foamy material so it doesn’t feel like you’re wearing safety goggles to sleep.

In the end, lash extensions look great especially in anticipation of a special occasion. I’ll certainly maintain them for as long as I can. But I think I’ll probably have them removed after a couple more refills to give my natural lashes time to recuperate. Next experiment will probably be some healthy lash treatments for my natural lashes. That way they’ll be in better shape for my next set. I feel like they are pretty stressful on natural lashes, especially if you’re like me and have thin, short lashes.

If you’re interested in lash extensions and live in the north Dallas/Richardson/Garland area, Jennifer is amazing to work with. She offers personalized service with a friendly and relaxing atmosphere. Not only does she offer lash extensions, but she also offers skin care services such as diamond microderm, enzyme peels, and more. Comment below and I’d be happy to give you her contact info!

Morning Skincare Routine

Winter poses different challenges for my skin. It has to be able to combat the cold, harsh Texas wind as well as the warm, dry indoor air. Both types of environments can be drying, even if your skin is combination oily. All skin types need moisture. Enter the winter skincare routine.

Five months ago I looked at my myself in the mirror, and I mean really analyzed my skin, with a discerning eye. I had dry patches, ruddy, uneven tone and color. Some areas were exceptionally oily. I had also started to develop dark circles and fine lines beneath my eyes. Not only did my makeup-less skin look in poor shape, but even with makeup, there was no amount that could correct what was wrong underneath. That’s when I decided I needed to introduce a skin care routine back into my life.

Part 1 of My Winter Skincare Routine: Morning

In the morning, my face usually isn’t that dirty. I tend to use a slightly more emollient moisturizer at night, especially during the winter months, to give it more time to absorb, but other than that my morning routine isn’t about heavy makeup removal. It’s just about light cleansing.

To start I use Clarins Gentle Foaming Cleanser with Tamarind and Purifying Micro Pearls. I’ve been using this cleanser for about 3 months now and to be honest, it’s better for the summer months. It really cleans to the point where my skin feels tight and squeaky. But it’s what I have so I’m going to use it until it runs out!

The thick consistency of Clarins Gentle Foaming Cleanser with Tamarind and Purifying Micro Pearls makes it easy to work into a thick, creamy lather.

The consistency is like very thick, whipped cream. It works up into a nice foamy lather. It says there are “purifying micro pearls” but to be honest, these so called pearls could just as well not be in there and you wouldn’t miss a thing.

This is also where my Clarisonic Mia 2 comes into play. And I really only use it once a day, primarily in the mornings.

Once I’m finished washing my face with the Clarins Gentle Foaming Cleanser and Clarisonic, I pat my skin dry. Using a cotton pad, I lightly apply Mario Badescu’s Cucumber Cleansing Lotion.

I’d actually recommend this toner for oily/combination skin during the summer months. The alcohol in this cleansing lotion tends to be a little drying, hence the reason why I tend to over-moisturize.

Because it contains alcohol and can be drying, I don’t rub it in too harshly, except in the crevices around my nostrils. Anywhere your skin folds into itself is an area that’s likely to gather a lot of dead skin cells and gunk so I like to give those areas a good cleaning. This is another product I probably wouldn’t use for a winter skincare routine, but because I don’t want it to go to waste, I’d rather use it.

This serum is totally worth it. It does what it says and offers ultra hydrating moisture in a lightweight gel.

Next I apply First Aid Beauty’s Ultra Hydrating Serum. Around $40 for a small bottle, this is the most expensive serum I own (though it probably won’t be my last). This clear, lightweight gel fulfills its promises and delivers an ultra hydrating layer of moisture to your skin without weighing it down. This is particularly why I like using this under my makeup.

This is a simple hydrating eye cream that I picked up from Target. It absorbs quickly and has a pleasant, fruity scent.

After my serum, I’ll apply a simple hydrating eye cream. Right now I’m trying the Boots Botanics Hydrating Eye Cream. I picked this up on clearance at Target so it was a steal. It’s a lightweight cream that has a pleasant fruity smell and absorbs quickly under the eyes.

I also started using this upper eyelid product twice a day called Clinical Strength Upper Eyelid Lifter from Bremenn Clinical. This particular eye cream is supposed to be used for the upper eyelid to target its specific issues (mine being excessive wrinkleyness!) I’ll often apply this one after the other eye cream since it’s a heavily concentrated formula. It’s not my favorite eye product because honestly it has this awful smell, but at least you don’t have to apply a lot.

The last step in my morning routine is a moisturizer. Yes I did apply a moisturizing serum but this is on top of that! Remember it’s still pretty chilly around here and when your skin is well-moisturized it’s not likely to produce excess sebum and appear really shiny. Lately I’ve been using a moisturizing balm from Lush called Magical Moringa

Lush’s magical tub of Magical Moringa. On cold mornings, this thing is solid as a rock. I usually have to rub my fingertips into the product until it melts enough for me to be able to apply it to my face.

This moisturizer is unlike any moisturizer I’ve tried before, except for maybe Benefit’s Dr. Feelgood, but even that isn’t categorized as a moisturizer. And Dr. Feelgood leaves a matte finish at first, but then over time my face turns into an oil slick. With Magical Moringa, it’s the opposite. The product starts out as a buttery balm that melts into an oil on contact, then it seems to quickly absorb into my skin leaving a soft matte finish. I’ve been really impressed with it so much that I use it both morning and at night.


Nudestix Magnetic Eye Shadow, Stila Kajal Eye Pencil, Urban Decay 24/7 Eye Liner

A Week of Experimentation With Nudestix & Colored Eyeliner

Ever since I was a teenager, I loved everything about makeup and skincare. I would often search for answers regarding can you do IPL at home? And what are the best ways to make an at home face mask. My love for it waned after college when I sought financial independence. At the time there were other things I had to spend my money on besides that $30 tube of lipstick (like rent, electricity and food). But now I’m a bit older and I live in a dual-income household with no children to support. I’ve got the expendable income and as a result, my makeup love has been revived. You can also read about the benefits of moringa oil for skin and see how it can help rejuvenate.

So I’ve been buying a lot of makeup palettes lately, especially eye palettes. This week I used the Nude(art)ist Box palette from Nudestix every day. I purchased this set on a whim from Sephora over Black Friday weekend.

Creamy crayon makeup is normally not my thing. I have oily eyelids which are both a blessing and a curse so I often avoid creamy eyeshadow formulas and religiously use eyeshadow primer. However, as this post by the American Acne Foundation points out, this brand claims that their eyeshadow has a built-in primer so even oily lids can use their Magnetic Eye Color pencils.

That sounded like a challenge to me.

Nude Eyes and Colored Lines

Nudestix Magnetic Eye Shadow, Stila Kajal Eye Pencil, Urban Decay 24/7 Eye Liner
Nudestix Nude(art)ist Palette, Urban Decay 24/7 Eye Liner and Stila Kajal Eye Pencil

For this week I decided to sport the smokey nude eyeshadow look using this palette. However, I didn’t want to go all nude, so I added a pop of color with some colored liner that I’ve had in my makeup stash for a while: Urban Decay’s 24/7 Glide-On Eye Pencils in Lust (dark purple with pearly finish), Binge (a navy blue with a pearly sheen), and 1999 (reddish plum with bronze shimmer). The colors I have are discontinued. I rarely used them because I was afraid of colored liner for a long time. This week I decided to take a leap and give them a shot. Now I’m obsessed and just bought a new one to add to my collection. There’s an excellent article on Temptalia about finding comparable liner shades to some of these discontinued shades.

And just to complete the smokey look, I lined my waterline with Stila’s Kajal Eye Liner in Onyx, another recent purchase.

The Nude(art)ist Box palette from Nudestix comes with 6 neutral colors in their two formulas, Matte and Luminous. Their colors are:

  • Angel (luminous) – Shimmery pale pink
  • Lilith (luminous) – Shimmery pearl
  • Twilight (luminous) – Shimmery taupe
  • Army (matte) – Matte earth brown
  • Putty (matte) – Matte medium beige
  • Taupe (matte) – Matte taupe

The Experience

Well, the Nudestix creamy eye formula proved to live up to its reputation for the most part. The first couple days I wore the Magnetic Eye Shadow, I would accidentally apply eyeshadow primer beforehand. Because primer is meant to leave a somewhat tacky surface for powder eyeshadows to adhere to, it made it more difficult to blend the creamy eyeshadow sticks. The final result was uneven and splotchy.

The trick is to use the Nudestix Eye Shadow without any primer. The shadows glide on smoothly and remain blendable for several seconds before they set.

And in regards to blending, these shadows blend well with a finger or a brush. I tried both and ultimately I ended up using brushes to blend. It was just easier to control. Plus a couple times I came close to poking myself in the eye with a fingernail.

Once I figured this out, working with the creamy formula became a cake walk. One day I did a pale frosty eye. The rest of the week I did a smokey eye with colored liner. The matte finish held up well during the day. There wasn’t any creasing or fading. The luminous finish did show a tiny bit of creasing. In general though, the luminous finish tended to look oily anyway.

The Verdict

Nudestix Magnetic Eye Shadow and Urban Decay 24/7 Eye Liner
Nudestix Magnetic Eye Shadow in Taupe and Putty with Urban Decay 24/7 Eye Liner in Binge.

I liked these shadows especially for a simple, everyday eye look. The pencil application was quick and convenient. I could see myself keeping these in my makeup bag for on-the-go use. Also because the eyeshadow primer is built-in, these would make great bases for powder shadow.

Other Products Used

  • Tarte Clean Slate 12-hour Poreless Perfecting Primer
  • Lush Colour Supplement (Dark Yellow)
  • Rimmel Lash Accelerator (Black)
  • Amazing Cosmetics Blush (Pink Chocolate)
  • Tarte Amazonian Clay Matte Waterproof Bronzer (Park Avenue Princess)
  • Urban Decay Naked Skin Ultra Definition Pressed Finishing Powder (Naked Medium)

Tips for Shopping for Engagement Rings Online

Getting engaged is one of the happiest and most exciting times for a couple. Every person has different preferences on how engagement ring shopping should go. For us, it went better than we could ever have imagined. So you could read about our story below, or you could just skip to the tips on shopping for engagement rings online here. Continue reading “Tips for Shopping for Engagement Rings Online”